In-House Metallurgy Lab
At Smith Metal Products our fully equipped in-house metallurgy lab provides element analysis of material characterization and testing. We are one the very few, USA MIM molders to have a fully equipped in-house lab, and are proud to offer these capabilities to our customers. Our commitment to Quality is ongoing and strive to continue enhancing all aspects of our MIM manufacturing.
We can perform micro-structure analysis, fatigue testing, tensile testing, hardness, density, and carbon analysis. Full geometric inspection with Statistical Process Control (SPC) is available for all MIM materials and components. With these capabilities Smith Metal Products is able to maintain tight control of all aspects of the MIM process.
We utilize Trinocular Metallurgical Microscope technology to analyze sample MIM materials. The MIM materials are mounted into puck-shaped holding devices and the metal material is polished before inspection. Samples are then analyzed under magnification from 50x to 400x for consistency of micro structures, grain, and overall consistency. Through this inspection process we evaluate the materials for porosity and trouble shoot for other problems such as cracking or sharp corners. If potential problems are detected we can work with the customer to identify the issues and recommend part design changes to correct them.
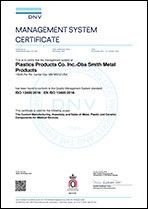
All details including Image Capture and Measurements are then compiled and a quality report is generated and logged into the Smith Metal Products data base for ongoing documentation, tracking to assure your MIM components are of the highest quality. We are certified to ISO 9001:2015, ISO 13485 Certified, and striving for ISO 22068 in late 2020.
MIM Materials we commonly MIM mold and perform ongoing analysis for include TiMIM (Titanium, Stainless Steels and most ferrous alloys. The complete materials list includes the following materials:
Low-alloyed Steels | |
FN02 | case hardening |
FN0205 | hardenable |
4605 | hardenable |
FN08 | both |
8620 | case hardening |
8740 | hardenable |
4140 | hardenable |
4340 | hardenable |
100Cr6 | hardenable |
1010 | case hardening |
S7 | Hardenable |
Stainless Steels | |
316L | non-magnetic |
PANACEA | non-magnetic, Ni-free |
17-4PH | hardenable |
420 | hardenable |
430 | ferromagnetic |
440Nb | hardenable |
310N | heat resistant |
Specialties | |
In•100 (dev.) | heat resistant |
In713 (dev.) | heat resistant |
GHS-4 | heat, wear resistant |
Ti | non-magnetic, inert |
W | non-magnetic |
F15 | low thermal expansion |
M2 | wear resistant |
Soft Magnetic |
FS |
FeSi3 |
FN50 |

Smith Metal Products in-house metallurgy lab includes Extensometer Inspection Devices for specific tensile bar to pull strength tests standards. We use Mtest-Qutro and SPC charting to calculate mechanical properties for our MIM and TiMIM material runs. These tests confirm material integrity from batch to batch for producing highest quality MIM parts on a ongoing basis.
Analysis results include: | |
Auto elongation at break | |
Load at break | |
Maximum load | |
Maximum stress | |
Modulus of elasticity | |
Stress at break | |
Yield strength |


Macro hardness testing system.

Micro hardness testing system.
Smith Metal Products utilizes Macro and Micro hardness testing to measure hardness and part integrity according to the requirements of the MIM materials and its applications. Each piece of equipment is precisely calibrated and maintained to the appropriate hardness scales.
Macro hardness has a larger indenter and can be preformed on any flat surface of a part without any additional preparation so it is quick and easy. The micro hardness test makes a much smaller indent, 0.1–0.4 mm across for metals – the samples need to be mounted and polished in the lab to take measurements. The benefit of the micro-hardness is the ability to measure the hardness near the surface versus the core and the ability to check small parts or thin sections.
Our lab technicians utilize the test results to document production batches and communicate with our production teams potential production changes. At Smith Metal Products, our commitment to produce the highest quality MIM parts is backed by our on-going investment in equipment and personnel.

Pycnometer testing system.
What we mainly use the pycnometer for is to check the density of the parts after sintering. One of the main functions of the sintering process is to densify the parts. We can use the pycnometer to see if the parts did in fact reach full density.
It provides a useful metric since a part that is not fully dense is likely to be oversized which may not be caught until a later inspection. It can also indicate a change inside the furnace that may need to be addressed before we sinter any more parts. Our technicians generate final density results and add to each part lot certificate.